Friday, December 30, 2011

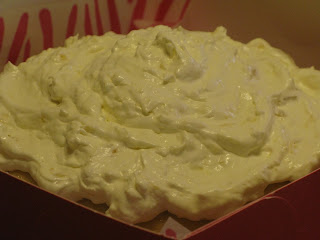
Auntie Gayle's Ambrosia Salad

Ambrosia Salad 

My Auntie came and stayed with us the first Christmas we had lost our Mum. Mum passed in October on the 15th, so not a lot of time to absorb any of the shock. What I will never forget about that Christmas is Auntie Gayle cleaned my oven, did all my laundry and made this kick ass salad! Thanks Auntie Gayle!


6-8 oz maraschino cherries (drained then quartered)
6 oz mandarin oranges (drained)
8 oz pineapple (chunks drained)
20 oz pineapple (crushed, drained)
15 oz fruit cocktail very cherry (drained)
16 oz sour cream
8 oz cool whip
3 1/2 oz instant vanilla pudding or seasonal pudding
2 cups marshmallows or fruity marshmallows or seasonal marshmallows
3/4 cup flaked coconut (optional)


Drain & quarter cherries first. Then drain & squeeze the crushed pineapple. Then you drain & add the remaining canned ingredients and stir in the pudding mix, sour cream & cool whip. Add the marshmallows last and stir them in gently.
2Chill then serve.

Chocolate Glaze for Cake or Flexible Decor

Chocolate Glaze for Cake or Flexible Decor


Serves: 1

Total time: 25 min     Prep time: 10 min


3 tbsps heavy cream
3/4 cup granulated sugar
1/2 cup water
1 1/2 tbsps water
  1 1/2 ozs cocoa (powder)
  1 1/2 tsps gelatin (unflavored, 14 sheets of sheet)


1In a large saucepan, combine cream, sugar, 1/2 cup of the water and the cocoa.
2Bring to a boil, reduce heat to a simmer whisking often until very thick like hot fudge sauce- 8-10 minutes from beginning of simmer.
3Watch carefully so miixture doesn't boil over.
4Remove pan from heat.
5While mixture cools, bloom gelatin in 1 1/2 tablespoon of cold water.
6Melt the bloomed gelatin over very hot water or in the microwave.
7(If using sheet gelatin, soften for 5 minutes in cold water, wring out gelatin and whisk into chocolate mixture).
8Whisk gelatin into chocolate mixture and strain the glaze through a medium sieve into a metal bowl.
9Let glaze cool at room temperature until thick but still pourable, about 5-10 minutes.
10Pour glaze over your cake or shape into decor  (this is very delicate for decor, you must shape but leave final ornament to harden, but is quite flexible)

Friday, December 16, 2011

Caramel Turtle Sugar Cookies

1
pouch Betty Crocker® Sugar Cookie Mix or your sugar cookie recipe (the mixes are quite good for baking with your kids)
Butter and egg called for on cookie mix pouch
2
  tablespoons all-purpose flour for rolling
12
  caramels, unwrapped
1
 tbsp cream
1
  cup hot fudge topping
36
  Pecan halves
  1. Make cookie dough as directed on package, stirring in flour. Roll dough into 1-inch balls; place about 2 inches apart on ungreased cookie sheets. Bake at 375°F 9 to 11 minutes or until set. Cool 1 minute; place cookies on cooling rack.
  2. Microwave caramels and milk uncovered on High 1 minute to 1 minute 30 seconds, stirring once, until caramels are melted. Caramels will continue to melt when removed so do not over heat. Dip one side of each cookie at an angle into caramel mixture to coat top half; spread if necessary. If caramel thickens, add up to 1 teaspoon additional milk and reheat.
  3. Spread about 1 teaspoon fudge topping on top of each cookie. Place pecan half on topping. Let stand about 15 minutes until toppings are set.
Makes 3 dozen cookies

Friday, December 9, 2011

Betty Crocker Raspberry Ribbon Slices


Raspberry Ribbon Slices 

Raspberry Ribbon Slices
Photo from our Betty Crocker recipe pamphlet. These cookies are delicious and we only modified one twist to add cherry preserves and almond extract! Enjoy
With a LOT of help from Betty Crocker we are pulling up to speed, our Christmas baking. Use your favorite fruit preserves that you made this summer and a time-saving shaping technique for a melt-in-your-mouth holiday cookie.Or purchase your fave, I love Dalfour cherry preserves! If you use the Dalfour remember to add a touch of almond extract to your dough!
Makes 3 dozen
 

1
pouch Betty Crocker® sugar cookie mix( this mix is amazingly delicious)
Butter and egg called for on cookie mix pouch
3
 tablespoons all-purpose flour
3
 tablespoons seedless raspberry, apricot or your favorite jam 
1/2 tsp almond extract if cherries are used
3/4
 cup powdered sugar
2
 to 3 teaspoons milk
  1. Make cookie dough as directed on package, adding flour; blend. Divide dough into thirds. Shape each third into 12-inch log. Place logs 3 inches apart on 2 ungreased cookie sheets.
  2. Bake at 375°F for 15 to 18 minutes or until edges are light golden brown. Cool 5 minutes. Using handle of wooden spoon or finger, make depression about 1/2 inch wide and 1/4 inch deep lengthwise down center of each roll. Fill indentations on each roll with generous tablespoon jam. Cool; place on cooling rack. Cool completely.
  3. Mix powdered sugar and just enough milk for drizzling consistency; blend. Drizzle icing over cooled logs. Cut each roll diagonally into 12 pieces.
Makes 3 dozen cookies

Monday, December 5, 2011

Scottish Shortbread Grannie Walker Style

This time of year conjures up one big family secret after another with each of us wondering how did "she" get her shortbread to be so "melty" She being any one of our Aunt's, my now deceased Mum and Gran's and of course my sis banging her head wondering how I make mine so melt in your mouth super yummylicious! I decided to post Gran's recipe with my couple of secret bits and I am not even going to tell my sister!

Ingredients

  • 1 cup (250 mL) unsalted butter, softened
  • 1/2 cup (125 mL) superfine sugar
  • 1 Pinch salt
  • 1/2 tsp (2 mL) vanilla bean paste (keeps shortbread from colouring)
  • 1/2 cup (125 mL) rice flour (the big secret!) You can use cornstarch too!
  • 1-3/4 cups (425 mL) all-purpose flour

Preparation

Line rimless baking sheets with parchment paper and set aside.
In large bowl, beat together butter, sugar and salt until fluffy and almost white. Stir in vanilla then rice flour. Stir in all-purpose flour, one-third at a time. Form into 2 flat rectangles. Make sure to stir where it says stir or else you will not achieve the "melty" results
Between waxed paper, roll out rectangles to generous 1/4-inch (5 mm) thickness. Cut out 1-1/2-inch (4 cm) circles, bells or even stars! Place, 1 inch (2.5 cm) apart, on prepared pans, re-rolling scraps and chilling dough between cutting.  I use cornstarch and flour mixed for rolling on the waxed paper. Use gingerly!!! Refrigerate until firm, about 30 minutes. I put a halved drained maraschino cherry on my rounds and then sprinkle with berry sugar (many use glaced cherries but I like the maraschino) You can get fancy with sprinkles etc should you wish!
Bake in top and bottom thirds of 275°F (140°C) oven, rotating and switching pans halfway through, until bottoms are light golden, about  30 to 40 minutes. Let cool for 2 minutes on pans on racks. Transfer to racks to let cool completely. (Make-ahead: Layer between waxed paper in airtight containers and store at room temperature for up to 5 days or freeze for up to 2 weeks.)

Tuesday, November 22, 2011

Pumpkin Chiffon Pie

Happy Thanksgiving to all my American readers! It is cool this year because I got to have a Canadian Thanksgiving and now I am in the USA for an American Thanksgiving my second year in a row!!! This year I planned to make everything I didn't get to at my Canadian festivities!
My kids like Costco Pumpkin pie (gak) so my Mum's traditional recipe gets set aside until Christmas or turns into muffins, either or! Well this year I get to make it for this Thursday!
The beauty of this recipe is if you do not want it chiffon-y you can stop before the egg white beating, folding, scary parts and just pour your cooled filling into a baked pie crust or a gingersnap cookie crust. I make enough for both options and a batch of muffins. I knew my Mum was a smart cookie but I never questioned her in the kitchen, just observed silently. Ohhhh the things I could say to her now! Did I mention anywhere we were in Martha Stewart's December issue on page 154? Well then you better go buy a copy! My Mum loved Martha and would be so proud to see her eldest (me) in Martha print as Mum watched her everyday and then did what Martha did all the time all by her wee self! How about that for a super mentor I had in my Mum! So here goes and please watch my little notes! Enjoy!
This is what your filling should look like before chiffoning it!

PUMPKIN CHIFFON PIE
  • 2 envelope (1 tablespoon) unflavored gelatin
  • 1/2 cup water
  • 8 eggs, separated
  • 2 1/4 cups brown sugar
  • 2 1/4 cups pumpkin (one large can)
  • 1 tin evaporated milk
  • 1/2 teaspoon salt
  • 2 teaspoon ground cinnamon
  • 1/2 teaspoon ground allspice
  • 1/2 teaspoon ground nutmeg
  • 1/4 teaspoon ground ginger
  • or be like Alton Brown and love allspice and use 1 1/2 tsp of that instead of the nutmeg and ginger if you do not like ginger! ( Mum never knew about Alton!)
  • my addition this year was 1/4 cup maple syrup in the gelatin mixture and I subtracted 1/4 cup water ohhhh wow! ( I used amber from Michigan that a good friend Lisa sent to me) I <3 her!
  • 2 recipes pastry for a 9 inch single crust pie (or 1 gingersnap crust and one pastry crust!)
DIRECTIONS
  1. Mix the gelatin and water in a small bowl, and set aside.
  2. In a medium bowl, beat the egg yolks until thick. Mix in 1 1/2 cups brown sugar, pumpkin, evaporated milk, salt, cinnamon, allspice, nutmeg and ginger.
  3. In a double broiler, cook the mixture over boiling water, stirring constantly, until thick. Mix in the gelatin. Stir to dissolve. Remove from heat and allow the mixture to thicken until it mounds when dropped by the spoonful. I chill mine overnight!
  4. In a clean, dry medium bowl, beat the egg whites until soft peaks form. Gradually mix in the remaining 3/4 brown sugar, and continue beating until firm. Fold in the pumpkin mixture. Transfer to the pie crust or two Chill until firm, about 1 hour, or overnight. You can reserve enough pumpkin for a non chiffon pie before the beating and folding of the eggs ... often scary for a first Thanksgiving or even a 5th for that matter (I've been there as I lost my Mum at 33 years of age) 
  5. Serve with your fave whipped topping and I am hoping it is real whipped cream! This is easy to do, pour whipping cream in a chilled metal bowl, start to beat until soft peaks form and then add your vanilla and tiny bit of sugar. Continue to beat until dollupy (haha) and serve on cold pie

Tuesday, November 15, 2011

Get Your Ginger on Early

From Five roases 1915 edition these cookies have lived up to their status for every baker in my family and is now a Sweet Tradition. Could they be you next Sweet Tradition, let me know!

Sweet Cuppin Cakes Traditional Ginger Molasses Cookies
Recipes in early cookbooks, such as the 1915 edition of the Five Roses Cook Book, show that ginger cookies have been a favourite for generations.

Ingredients:
1-1/4  cups (300 mL) granulated sugar
2/3 cup (150 mL) vegetable oil
1/4 cup (50 mL) fancy molasses
1 egg
1-3/4 cups (425 mL) all-purpose flour
1-1/2  tsp (7 mL) ground ginger
2 tsp (10 mL) cinnamon
1  tsp (5 mL) baking powder
1  tsp (5 mL) baking soda
1/2 tsp (2 mL) salt

Preparation:
In large bowl, whisk together 1 cup (250 mL) of the sugar, oil, molasses and egg until smooth.

In separate bowl, whisk together flour, ginger, cinnamon, baking powder, baking soda and salt ; stir into sugar mixture.

Shape by rounded tablespoonfuls (15 mL) into balls; roll in remaining sugar to coat. Place 2 inches (5 cm) apart on parchment paper–lined or greased rimless baking sheets.

Bake in top and bottom thirds of 375°F (190°C) oven, rotating and switching pans halfway through, until cookies spread out and tops crack, about 10 minutes. Let cool on pans on racks for 10 minutes; transfer to racks and let cool completely. (Make-ahead: Layer between waxed paper in airtight container and store for up to 3 days or freeze for up to 1 month.)

* Tip: You can spice up this classic by adding 1/3 cup (75 mL) finely chopped crystallized ginger to the dry ingredients, or you can add 2tbsp ginger paste found in tubes in your produce dept. at your fave grocers


Friday, October 21, 2011

My Official Mice Day

This is my calendar day to begin my Christmas mice fairy ornaments, which also marks the day to houseproof for mice! Last year a very terrible thing happened. We forgot to check the dryer vent going outside. Oh yes, we did. Needless to say first Mickey and his gal moved in and had baby mice. I really am not so sure how many, but they had a lot!! Then I think they told all their pals, "hey this gal has a warm stove all the time and bakes a lot of yummy stuff for us!" Well before you knew it we were absolutely swarmed with them, and as cute as they are, we had to take action and quick. In hopes to never have to take such action again, we are making sure the little cuties can just stay cute outside, doing their own outside winter things.
So while those mice are doing their outside mouse things we can busy ourselves doing inside mouse things for Hallowe'en, Christmas or just about any reason, even loving those cute destruction loving monsters!
Sugar Mice, from The Unofficial Harry Potter Cookbook (Adams Media, 2011)
The baker in you can get way busy making little adorable sugar mice, thanks to Canadian Living and author Dinah Bucholz. Afterall, Harry Potter had the cutest little mice and you can too!
I changed the recipe up a bit, but you can find the original here in the book The Unofficial Harry Potter Cookbook: From Cauldron Cakes to Knickerbocker Glory--More Than 150 Magical Recipes for Muggles and Wizards

I absolutely know my sweet niece Breanne will go mad for this book! In the meantime she can learn how to build Auntie's mice.

I believe the mice really were white in the Harry Potter Books but I like mine more a caramel toffee brown so will show you how to make those. You can absolutely make both because they reign in cuteness.

Please make sure to gather all your recipe potions at the market ahead of time so you are ready set .... go!


Sugar Mice

Ingredients/Shopping List

3/4 stick (6 tbsp) butter, at room temperature 69F-72F is best
1/4 cup white corn syrup (this allows you to use any food colour gel you wish to and also keeps your mice white if you would like that)
NOTE: (1/4 cup dark corn syrup will help attain your golden mouse colour I prefer)
1/2 tsp pure vanilla bean paste (so you can keep your wee mice colour true)
3 cups confectioners’ sugar, sifted
Gel paste food colour (I use orange and brown to get a caramel tan colour) You can find these colourings at Michaels or even bulk food stores like Bulk Barn
1/4 cup confectioners sugar sifted on work board

Directions:
1.    Combine the butter, corn syrup, and vanilla and beat until thoroughly combined. Add the confectioners’ sugar slowly on the slowest speed until it forms a dough-like consistency. If you add to quickly the powdered sugar will fly all about making a horrendous mess. Add more confectioners’ sugar, 1 tablespoon at a time, if the mixture is sticky, not too sticky you can wrap the fondant in plastic wrap and refrigerate until ready to use. You will also be working on powdered sugar which will also allow absorption of the "stickiness" This sugar dough will keep for several months in the refrigerator.
2.    To make the sugar mice, pinch off a small piece of fondant and roll into a 1/2-inch ball. Roll the ball into an oval and pinch one end for the nose and two ends to make pointed ears. You can make two indentations for eyes with a toothpick. Pinch off another piece of dough to form a 1 1/2-inch ball and shape into an oval for the body. Attach the body to the head. You can stick a piece of licorice into the back for the tail. If the fondant gets too soft to work with, put it back in the refrigerator to firm up again.
3.    Repeat until all the fondant is used up. Line up the mice on parchment paper and leave out overnight to dry.
Makes about 20 Sugar Mice
By Debbie Brown author of many fine books
You can also get formal sculpting lessons for a more particular mouse from my friend Debbie Brown. Hers look like the photo to your right because they are hers!

Debbie Brown has several books published and they are all amazing! I know I own them all. Especially for this particular tutorial which fittingly for the season, has these sweeties living in a pumpkin house, you will want her book Debbie Brown’s 50 Easy Party Cakes

You will see Debbie's adorable pumpkin house on the cover of her book! Thinking of maybe that is how I can keep those mice out of my house .... line up a bunch of Debbie Brown Pumpkin houses up outside. I am more than certain they will move right on in!
You can purchase this book here

Note about British culture: Making little animals such as mice or pigs out of an easy-to-make fondant is a popular activity for British kids. Often you can purchase fondant from a cake decorators supply store if you want to make many and quickly.
Then back to my opening sentence, my mice fairies. last night I was up until the wee hours making their wee legs and booties. And you can do the exact same thing with fondant and black edible paint markers.

Onward to show you all the little mice legs I have made, more on that though another time.  Happy mousing and many thanks to my friend Debbie Brown!

Cheers!

Thursday, October 20, 2011

Queen Elizabeth Cake

Queen Elizabeth Cake


by Sweet Cuppin Cakes Bakery Lyndsay Zoratti
 

Pour 1 cup of boiling water over 1 cup of chopped dates and 1 teaspoon of soda.
Let your dates stand and prepare the next ingredients using a basic cake method, Cream butter, sugar and egg Then sift together dry ingredients add to your creamed mixture in 3 increments. Stir in nuts and vanilla.

Ingredients:

1 cup of sugar
1/4 cup of butter, creamed with sugar
1 egg, beaten
1 1/2 cups of sifted flour
1/2 tsp. of baking powder
1/2 cup of crushed walnuts
1 teaspoon of vanilla paste
Add the date mixture to your batter by folding in. Pour into a prepared pan. I use a 9 inch round fat daddios pan. Bake at 350F for 35 mins or until cake tester comes out clean.
You can torte it with more date filling or frosting if desired. Simply slice the cake in 3 equal layers. This cake also lends itself to marzipan figures decorating the top and sides.

Brown Sugar Frosting
5 tablespoons of brown sugar
5 tablespoons of cream
2 tablespoons of butter
You can add maple flavoring here which I love
Boil for 3 minutes and spread on cake.  If you torte the cake you will need to double this and I suggest pouring it on the cake and let the frosting make its own way around the cake.
Sprinkle with nuts, if desired.

Optional date filling for torting:
2 pkgs chopped dates (Sun Maid)
1/2 - 3/4 cup water
1/8 cup sugar
cook over medium heat until dates are soft and you have a smooth paste
Add 1 tsp lemon juice

Thursday, October 13, 2011

Peanut Butter Creams

Peanut Butter Creams
Makes 30 
1/4 cup confection sugar
1 Cup Chocolate Chips
1/2 Cup Sweetened Condensed Milk
1 Cup Peanut Butter

1. Put the confectioners sugar in the bowl.  

2. Add the chocolate chips.  
3. add the milk. 
4. Add the peanut butter.  
5. Then stir everything together with the spoon.  
6. Next drop pieces of candy onto the waxed paper.  
7. Chill the candy for a short time.  


Notes: ****Use sweetened condensed milk, not the evaporated milk.  You get about 30 small peanut butter creams. These look fantastic served up in our wonderful collection of size 37 cupcake liner. I love these ones

Thursday, October 6, 2011

PIneapple Topping or Filling for Cupcakes

PIneapple topping or filling for Cupcakes


Ever want something other than buttercream, I hear you! I have changed a lot of things in this wee recipe and am certain my Gran did too. I had hoped to find a snipping with her wild writing on it.

8 ounces cream cheese
1 small box instant pudding vanilla (today I used Cheesecake pudding)
14 ounce can of crushed pineapple with juice
8 ounces whipped topping
Mix together cream cheese, instant pudding and crushed pineapple with juice. The trick here is to beat the cream cheese until it is very light and fluffy adding the pudding mix with most of the pineapple juice. When this is done stir in the remaining crushed pineapple and any leftover juice. Gently fold in whipped topping to the mixture. It is important to fold in the whipped topping with a large spatula, because you do not want to beat the dickens out of the air in the whipped topping. Get a large pastry bag armed and ready with an R4 pastry/meringue tip. (this is much bigger than a Wilton tip. I have a guide below of what not to buy. I keep a few of the R4 nozzles in my webstore.)
Today I made a three layer torte for my Doc, for Thanksgiving, because if there is anyone I am thankful for it is her. She takes care of our whole family and the awesome thing is she cares!

Pipe your topping on, in winder motion round and round or dollup dollup dollup! The dollup motion uses less frosting and wont make "too much" for anyone .... once you taste this though, there really is not a too much! Also do not get any exciting ideas of covering this in a white ganache, it doesnt work and it ends up looking like a meteor rock on top of your cupcake. You can however, take an apple corer and twist out some cake, fill the hole and frost with a whipped cream frosting.
1 pint whipping cream
1/2 cup confectioners sugar
1 tsp vanilla or 1 tsp coconut flavouring
Whip until soft peaks form and pipe with a large round nozzle fitted bag atop your cupcake.
Here I dolloped with a big spoon because it is soooo good!
Do not throw out your cored bits of cake, save them for crumble topping or cake balls. I store mine in the freezer until I have enough to do anything with, generally 2 cups. We will talk cake recipes in a couple of days. It is quite beneficial to this dessert to keep it cold.

R4 Nozzle used for meringues is the tip to use!


This is the chart of tips not to use for this recipe:
Hope you enjoy and would love if you commented below with whatever version you come up with!
Lynds

Wednesday, October 5, 2011

My Mum's Famous Banana Bread and my Banana Uncle

Mum's famous Banana Bread
also an adaptation by me.

There are a couple of stories that go with this recipe, not to mention the fact that it is one of my family's faves and one of my brothers fall down on the floor and moan if you put peanut butter and honey on a warm slice (honey first folks) let it soak into that warm bread and then the JIF peanut butter. JIF is truly the best. I should mention here, day old banana bread out of the fridge toasts brilliantly! I just like butter on mine. Everyone else uses honey and peanut butter.
Now my banana trivia Uncle. This particular Uncle of mine played for the New York Rangers and was a right winger. I can give you more clues another time. I mention this only to show you how worldly this man is. Well he was, and still is very cool, and married to my Dad's sister. So this Uncle of mine is a very knowledgeable guy. While making the banana bread with my Mum at Gran's house he is watching us peel the bananas. Well, you know to break the top of an overripe banana without a gooey mess can sometimes be next to impossible. Not for my Uncle because he pays attention. Over he saunters from the table, a place where we all gathered to laugh and have fun, and of course get warm treats out of Gran's old gas oven; grabs a banana turns it upside down and pulls off that wee bottom button thingie and the banana is so easy to peel. He looks at my Gran and says "That is how the monkeys at the zoo do it" hahaha Well you should have seen her face. I cannot tell you what else she said to him, but I will tell you she was from England. Nuff said haha.
It works! Try it. So I always think of that exact story and the four of them when I make banana bread.
Now for my family. We like to trade things up a bit sometimes, so today I made this recipe but added one teaspoon maple flavouring (Rawleighs only guys) put two dishers (size 16)* (8 TBS) of batter into each standard cupcake cup, I used these liners and had to do a tiny retro fit but hey, they worked. I sprinkled them with just a wee bit of chopped pecan bits. Banana Maple Pecan Muffin Cupcakes are born this October 5th 2011!
I plan to serve them on Thanksgiving morning, so will freeze and then when I warm them up I will glaze them with a simple maple glaze or warmed peanut butter with a melted maryjane in it .... Enjoy


This is a fantastic chart I found over at Wiki! It is accurate and wonderful.
The fate of the bananas in the background is coming soon.
The wee pedestal is also available in my wee shoppe.


Tuesday, October 4, 2011

No Bake Amazingly Good Don't drop your fork Cheesecake Pie

No Bake Amazingly Good Don't drop your fork Cheesecake Pie

For a few days now, since Saturday, I have had a couple of things on my mind. Nothing overly exerting or anything, well maybe the song driving me nuts in my brain. Yes, a song I heard at my nieces wedding that will not leave my mind. My brain starts singing it to me at random intervals of my day; like now .... It goes something like "If you like it you should've put a ring on it oh oh oh" It is likely I got the lyrics wrong but the music part is bopping around in my head like a bad dream. Where does it happen most, in my kitchen of all places, where my other conundrum happens to be. My daughter has come forth with the song should anyone else want to go bonkers It's Beyoncé — Single Ladies (Put A Ring On It) Thanks my daughter Jen, now please help Mum remove it from her mind. Friends it is horrible.
Onward ....

Chocolate Cream Pie: YES But not likely any old pie if you know me at all. It must be my Grans pie because there was magic in it. Gosh I should have paid a little closer attention to those odd twists and turns in the kitchen, she made. Kind of like "with a finger aside of her nose" kind of thing, "she turned with a jerk" Well after my great hunt I found the magic and in 2 short days this pie will be hitting the bellies of all I love on Thanksgiving. 

CRUST and CHEESECAKE
  • 1 1/4 cups graham cracker crumbs
  • 1/3 cup butter or margarine, melted
  • 2 teaspoons granulated sugar                                    
  • 1 envelope (.25 oz.) unflavored gelatin
  • 2/3 cup water
  • 2 pkgs. (8 oz. each) cream cheese, softened
  • 2 cups (12-oz. pkg.) TOLL HOUSE® Semi-Sweet Chocolate Morsels, melted with an additional 
  • 2 tbsp dark cocoa * and cooled *follow pkg directions for this
  • 1 can (14 oz.) Sweetened Condensed Milk
  • 1 cup heavy whipping cream, whipped
  • 1 tablespoon chocolate extract or vanilla

How to make this Cheesecake PIe

FOR CRUST:

 MIX graham cracker crumbs, butter and sugar together in 2 - 9 inch pie pans Bake at 350 for 8 minutes if you like. This firms up the crust but not required.

FOR CHEESECAKE

Sprinkle over water in small saucepan; let stand for 1 minute. Warm over low heat, stirring constantly, just until gelatin dissolves. Remove from heat. 

Beat cream cheese and melted chocolate in large mixer bowl until fluffy. Gradually beat in sweetened condensed milk. Stir in gelatin mixture; fold in whipped cream. Pour into prepared pie crusts. 2 prepared 9-inch (9 ounces each) graham cracker crusts can be substituted for the 9-inch spring-form bottom. Divide filling evenly. Refrigerate for about 3 hours or until set.Can be served with fruit and more whipped topping and Nestle chocolate shavings.


Cake Bridge

Cake Bridge by neviepiecakes
Cake Bridge, a photo by neviepiecakes on Flickr.

My friend Natasha Collins just blew my mind with this cake! This gal has such talent WOW!

Coca Cola Poured Frosting Tradition Recipe


Coca Cola Frosting (This is not a make ahead recipe as it is more like a poured fondant) I use this recipe for holiday petit fours. Enjoy

Yield: 2 cups
Ingredients
1/2  cup minus 2 tbsp real butter (no substitutions)
1/3  cup  Coca-Cola
3  tablespoons dark brute cocoa
1  (16-ounce) package powdered icing sugar
1  tablespoon  vanilla bean paste (this is so no more liquid is added)
Preparation
Bring first 3 ingredients to a boil in a large saucepan over medium heat, stirring until butter melts. Remove from heat; whisk in icing sugar and vanilla.

Thursday, September 29, 2011

Austrian Lemon Frosting love my Great Gran

Frost your cups Lemon
You could tint more yellow but I like it pale


Growing up I didn't see a lot of lemon in desserts except at Easter or Mother's Day, so I guessed just Easter Bunnies and Mum's liked lemon. It did not matter to me because I was not particularly fond of it at all. In trying this recipe, for the life of me I cannot figure out why I disliked it so much because this is delicious! So much so I will even make a batch for my poppy seed loaf recipe.


Austrian Lemon Frosting
Ingredients
1/2 cup butter
3 tbsp lemon juice
3 3/4 cups icing sugar
Blend low for 3 minutes Then Beat on high speed for an additional 5 minutes until super fluffy Add an additional tablespoon of lemon juice as you go if required.

Children's Buttercream
1/4 pound butter, room temperature
1 3/4 cups confectioners' sugar
2 tablespoons milk
1 tbsp cotton candy flavour* (my alteration) GR Gran used violet essence. (I loved that)
Any gel food colour * my alteration

     Beat butter in bowl of electric mixer for about 5 to 8 minutes OR until butter turns white.
     Gradually beat in half of the sugar, all the milk and then the remaining sugar.
     If you'd like a thicker mixture, add extra sugar on spoonful at a time.

Wednesday, September 28, 2011

Sweet Cuppin Cakes Bakery

chanel box cakecolourful mini cupcakesAir Force CakeCanon CameraBrown Damask CakeRed Velvet with Cream Cheese topping
Diaper Bag CakePeppered Fig and Tofu Feta GaletteBaby Girl.......Chocolate Peanut Butter SpidersAutumn Maple Leaf Cookie 2Chocolate Cake - How To
cookies & cream cupcakesFig ConspiracyHot Out of the OvenFarm AnimalsJules & MartinBananen-Cupcakes mit Bananen-Quark-Frosting
Fall Cupcake TowerFall Cupcake TowerPrincess CakeBananen-Cupcakes mit Bananen-Quark-FrostingBarbie convertible b-016 ~totcupcakes~

Sweet Cuppin Cakes Bakery, a group on Flickr.

Please come and see our groups collection of over 4000 photos and recipes. You will be glad you did xo Thanks everyone for such a great group <3

Tuesday, September 27, 2011

Mumma's 7 Minute Frosting

Mumma's 7-Minute Frosting

This frosting is crazy fun and my Mum used it usually on her angel food cakes. I remember one year it turned a soft pink and was a gorgeous skirt on my favorite

doll. WOW, was I stoked! 

The thing about this frosting is that if you let it set up on the cake and then poke it with your finger, the frosting lifts off the cake and you my friend are busted! That happened to me a lot because I just could not resist! 

To show you just how simple this is .... above you will see me, yes me and my 10th Birthday cake I made for myself because I was too scared somebody would forget to make me a cake. I have remained this paranoid about my Birthday cake ... and to keep count only two of my birthdays were cakeless. This did not fare well with me. Oh no no no!
Frosting for 1 layer cake or approximately 8 to 12 cup cakes

Ingredients

  • 1 1/2 cups sugar
  • 1/4 teaspoon cream of tartar
  • 1/8 teaspoon salt
  • 1/3 cup water
  • 2 egg whites
  • 1 1/2 teaspoons pure vanilla extract or 1/2 tsp strawberry or cherry extract if you are making pink frosting.
  • gel pink colouring to colour your fave shade of pink (less is best, you cannot remove more easily)

Directions

Place sugar, cream of tartar, salt, water, and egg whites in the top of a double boiler. Beat with a handheld electric mixer for 1 minute. Place pan over boiling water, being sure that boiling water does not touch the bottom of the top pan. (If this happens, it could ruin your frosting). Beat constantly on high speed with electric mixer for 7 minutes. Beat in vanilla. Fluff onto cupcakes or cake with an offset spatula making swirls and fluffs! Such fun. I, at 10 cut up chewy gumdrop rings to look like flowers and "fluffed" candle holders around the cake. I love that I put aluminum foil on the cake tray and how my candles are tipping over! Put your decorations on the cake or cupcake when frosting is semi set.

Monday, September 26, 2011

Snow Down On Me Coconut Frosting by my Gran

Frost your cups and share!

This frosting for me was just an amazing thing, especially when my Gran put the maraschino cherries on top. Her secret was to wrap those cherries in the fridge for 3 days in a paper towel with a "Do Not Eat Me" card tucked in the bowl. I remember watching the juice stain the paper note as it seeped up the edge, when it was time to go on the cake or cupcakes I would carefully take the note and stash it in my little cook book, needless to say I still have a couple of those cherry juice stained notes.
This frosting is pretty versatile but Gran put it on a very simple cake made with a yellow cake mix, she added a pudding mix; likely vanilla There was also sweet flaked coconut and pecans added to the cakes. Oil was 1/4 cup and water was 1 1/3 and eggs were 4. I will post the cake later on next week.
Now this amazing frosting:
Snow Down on Me Frosting
1/3 cup butter (no subs)
6 ounces cream cheese
12 ounces powdered confectioners sugar
2 tsp heavy cream
1/2 teaspoon vanilla
1/2 tsp coconut extract
1 cup toasted coconut
Beat your butter until such a pale yellow it is almost white, then thoroughly blend in the cream cheese. This frosting should look like clouds now. Add the sugar alternately with cream and watch carefully because you may not need all of the cream or sugar. Go by your taste! Lastly stir in the vanilla. Spread the frosting generously on top of your cupcakes or cake. Now here you can either use toasted coconut and pecans, non toasted sweet flake coconut and a drained cherry I like to do both and put them on a tray. This frosting is so much better to use the next day! Enjoy and frost your cups!